
Cloudflare deployment for the Free plan
FlowConsent Free uses your own Cloudflare account to deploy the required Worker and KV storage. This guide walks you through creating a restricted API token with the exact permissions needed.
FlowConsent Free uses your own Cloudflare account to deploy the required Worker and KV storage. This article explains how to create a restricted API token with the exact permissions needed, then connect it to your FlowConsent banner.
What you'll need
- A Cloudflare account (free plan is sufficient)
- Permission to manage Workers and KV on that account
- About 2 minutes
Step 1 — Create a Cloudflare API token
- Log in to your Cloudflare account.
- Open My Profile → API Tokens, or go directly to dash.cloudflare.com/profile/api-tokens.
- Click Create Token.
- Select Custom token (or Create Custom Token).
- Give it a clear name, for example:
FlowConsent banner.
Step 2 — Set token permissions
In the token builder, locate the Permissions section and add the following two rows exactly:
| Permission | Resource | Access |
|---|---|---|
| Workers Scripts | Account — your account | Edit |
| Workers KV Storage | Account — your account | Edit |
For Account, select the Cloudflare account where you'll deploy your FlowConsent banner.
Step 3 — Create and copy the token
- Click Continue to summary.
- Click Create Token.
- Copy the token immediately — Cloudflare only shows it once.
- In FlowConsent, go to Deployment → Cloudflare Configuration and paste the token into the Cloudflare API Key field.
Step 4 — Get your Cloudflare Account ID
- Open your Cloudflare dashboard.
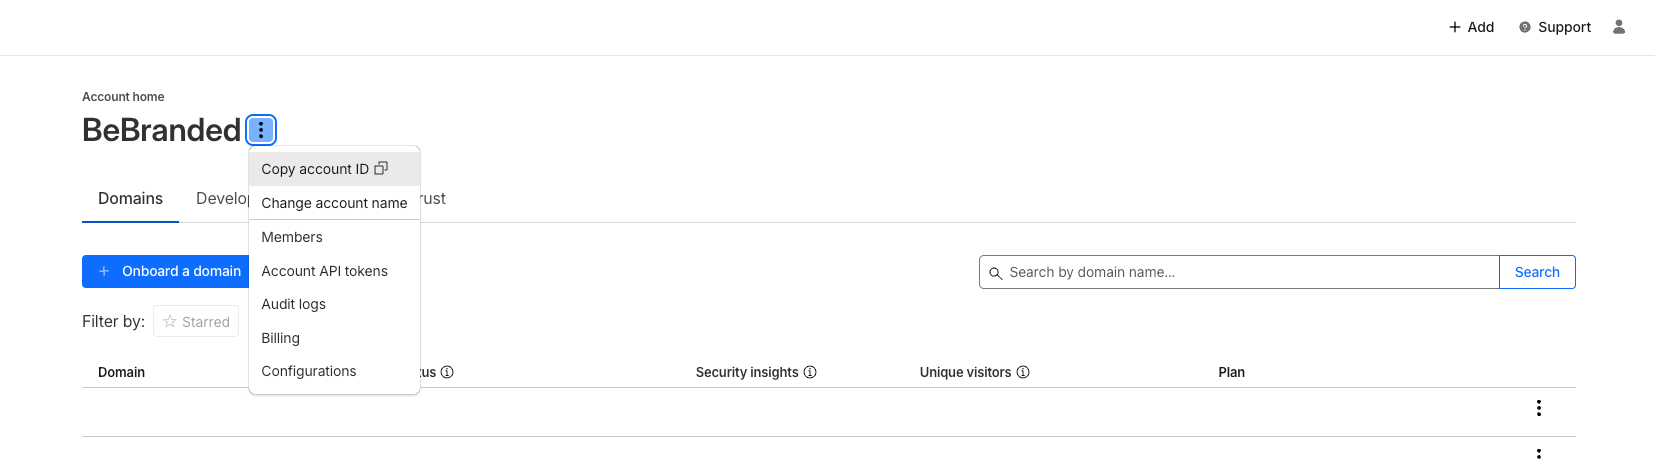
- Click the three dots next to your workspace name to reveal the Account ID.
- Copy your Account ID.
- In FlowConsent, paste it into the Cloudflare Account ID field of the Cloudflare configuration.
Step 5 — Give your Cloudflare Worker a name
Choose your Worker name carefully — you won't be able to change it after deployment.
Example: my-website-banner.
Naming rules:
- Only lowercase letters, numbers, and hyphens (
a-z,0-9,-) - Must start with an alphanumeric character
- Must end with an alphanumeric character
Step 6 — Test your access and deploy
Once your Cloudflare credentials are filled in and your Worker has a name, verify that FlowConsent can access your Cloudflare account by clicking the Test connection button.
If the test succeeds, you're ready to deploy your banner.